Category Archives: paint

No More Ugly 70’s Brown!!

Standard

Hubby and I aren’t the kind to ask for help when it comes to projects around the house.  We love being able to do it all ourselves, and love the pride that comes along with it.  But when I make a post on the ugly 70’s brown in our Masterbedroom, and I know I won’t be getting around to it anytime soon, and my mom calls to say my dad has time to do it if he can come the next day (a REAL bonus to having a blog people!  You don’t have to ask for help, everyone already knows you need the help!!  LOL)… of course I’m going to say “YES!”

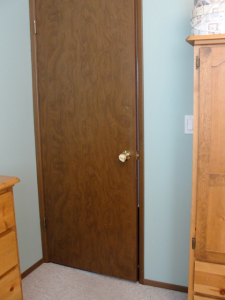
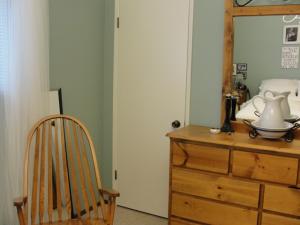
So, thanks to my fabulous parents, our Masterbedroon so longer sports the Ugly 70’2 Brown!!  Say hi to the Before and Afters!!

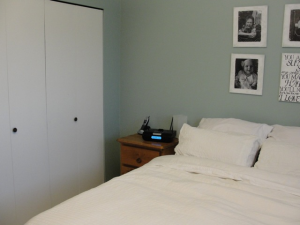
painting closet doors

Example #1 Before


painted closet doors

Example #1 After


painting doors

example #2 Before


painted doors

example #2 After


Example #3 Before


Example #3 After


Ahhh, how refreshing a couple coats of white paint can be!!

What have you painted lately??

Thanks for reading!

xo, Leanne

A Refinished Frame, and Today I’m Visiting….

Standard

Good morning!!  I’m very excited about today!  Today I am guest posting over at Sunshine.life.love!  Ashley at sunshine.life.love has an adorable blog, and she herself seems completely adorable, so head on over there and give her some love!  Plus, I blogged about a few things there that I haven’t mentioned here yet!

If you are visiting from sunshine.life.love, welcome!!  I am so happy to have you here, and I hope you like what you see!

So, just another heads up, I have scheduled my permanent change over to wordpress.org to happen February 28th!  With all sorts of things happening in my blog life, and in my personal life over the next couple weeks, I just want to make sure my calendar is clear around the time of the switch, just in case anything goes awry… and since I have been my own computer geek through this whole process, something is bound to go wrong!  🙂  So please watch my posts carefully around that time, as I am still not sure if it’s possible to automatically switch all of you over there myself, so I may need your help.  Plus, I will be offering a GIVEAWAY in the first week of the switch!

On to something more exciting… I showed off this frame at sunshine.life.love today, and I am going to share with you how I did it.  I am SO pleased with this project, I am in love with it… so here you go!

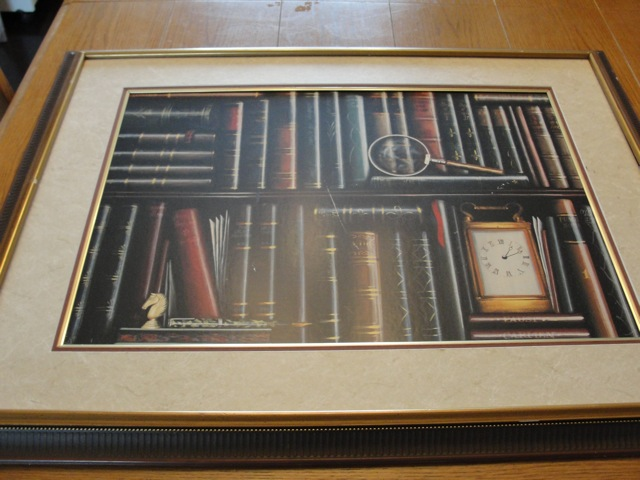
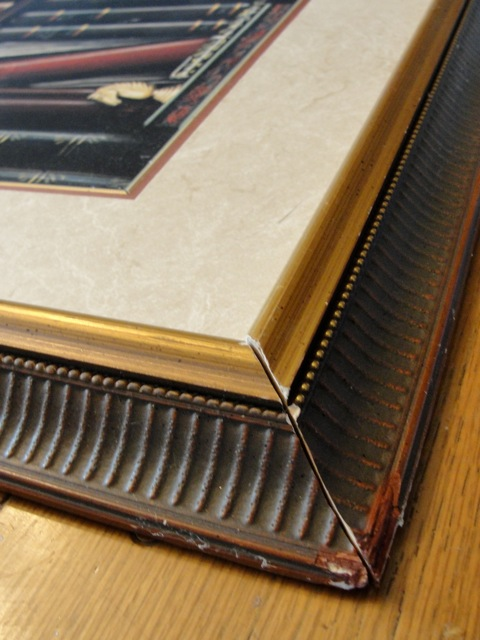
I picked up this picture and frame at a local thrift store last week for $10.  The lovely lady who rung it through said, “Oh!  What a beautiful picture and frame!!”  and I had to bite my tongue from saying “Not Yet!”

frame before

Frame, "before"

black and gold frame

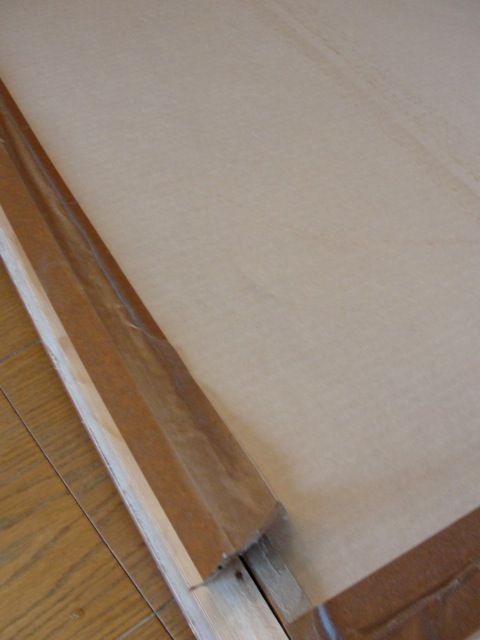
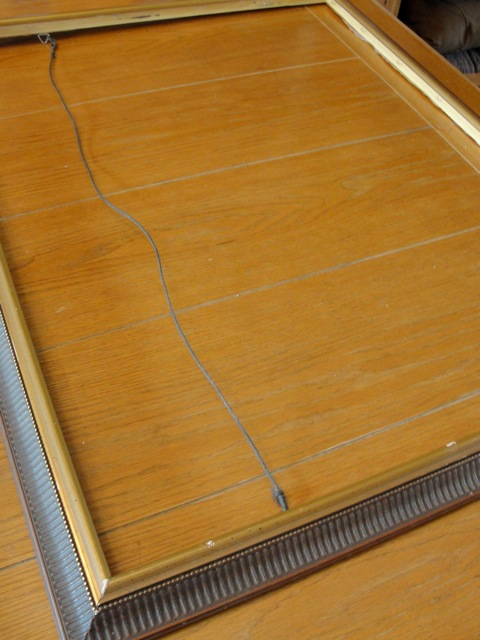
The first thing I did when I got home, was take the frame apart… anyone want to keep the picture?  😉

take frame apart

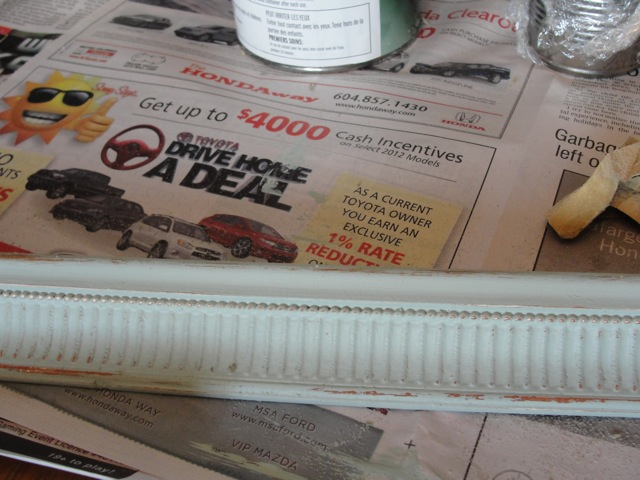
painting a frame

I washed it down, and went straight to work.

Wythe Blue, Benjamin Moore

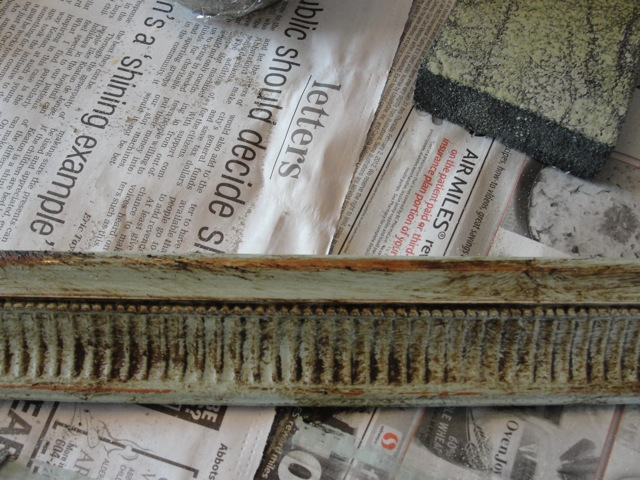
I gave it a coat of my Wythe Blue, from Benjamin Moore (the same color used for my Master Bedroom) and gave it some distressing.  I wanted both the brown and the gold from underneath to show through.

Annie Sloan Wax

I gave it a coat of Annie Sloan Clear Wax, and then a coat of Annie Sloan dark wax.  This is how it looked just after I applied the wax.  It scares me everytime!!

I gave the wax a good buffing with a clean cloth, and the next morning another buffing.

I took the cardboard that was holding the original picture in, and gave it 2 coats of Chalkboard Paint.  This stuff is super easy to use, love it!…  Attached a wire hanger to the back, and ta-da!  Here is the “after” shots!

after picture of painted frame

I needed something to write down the week’s menus, so I remember to take the meat out the night before… and also when I’m cooking and each individual member of the house takes turns coming into the kitchen asking what’s for dinner, I can now just say “look at the board!”

See how the dark wax gives such depth?  I love the effect it has.  I am in love with this stuff!

And I love the way the frame has finished off this corner of my kitchen… and no, I’m still not showing you the rest of my kitchen!!  It’s still so not blog worthy!

Thanks for reading, and have a fabulous day!

xo, Leanne

Ugly 70’s Brown

Standard
Ugly 70’s Brown

Wow, we are having an absolutely gorgeous sunny and warm day here!  Too bad I’m stuck inside cleaning house, doing laundry, and going grocery shopping after lunch 😦

A few “business things” first – if you haven’t checked out my linky party yesterday, please do!!  Find it here.  Anyone can participate, and we would LOVE for more bloggers to link up and show off your work!  I am co-hosting with 2 other bloggers, and would love to have you all join the party!

Next, many bloggers have used Google Friend Connect on their blogs, for followers to follow them that way… but Google friend connect has decided to drop themselves for most blog hosting sites… meaning many bloggers are losing many followers.  This doesn’t affect me at all, however I have signed up with the new alternative, Linky Followers.  You can now find it on my sidebar as a following option.  This is a really cool little setup for everyone to use, you can categorize and organize all the blogs you love to read, and find them all in one spot.  And of course it’s free for everyone to use!

So, I have mentioned my Master bedroom a few times in the past… just before Christmas we gave it a little facelift.  I forgot to take before pictures, but it was very b.o.r.i.n.g.  Very brown and monochromatic.  I wanted bright, cheery, and beachy… and used this for my inspiration:

Gorgeous, right?!  (source)

So after taking forever  to choose the right shade of turquoise (the Rainwash color in this photo was just too bright for our room), I finally settled on Wythe Blue by Benjamin Moore.  I loved it when it went on, and still love it now…. but something is wrong with the room… so I haven’t talked about it since.  But today, I will share what I have so far with you!

First, we really need a headboard for the bed.  I have a fe ideas in mind, but haven’t gotten any hubby commitment yet (and nned it, because he’d be doing the construction!)

Why are the lights off?  Because the chandelier was another part of the makeover… I bought it like this for $5, and changed it from this,

chandelier "before"

to this,

chandelier "after"

I painted the whole thing with white paint, and love the way it turned out, until the light goes on, and looks like this,

Ug.  I could replace the shades with some white fabric ones, but can’t find the right white or a shape that I like.  Any advice??  Please??

Not to mention it’s still hanging by a zapstrap,

Family members, please let my big brother know I’ve blogged about it now!  Time for him to come and finish the job he started!!  😉

Plus, my old ratty mirror is still waiting for a frame to be built, by the pine waiting patiently behind it…

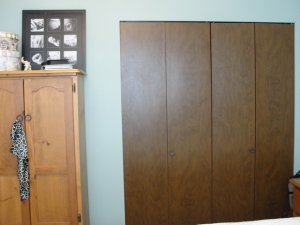
But that’s not the worst of it.  I’ve been trying to ignore it, but when my friends came over at Christmas time, they made me admit it…(what are best friends for anyways?!)  these ugly brown doors and trim have to go…

example 1

example 2

example 3

The idea of painting all these doors (because you know I couldn’t just do my room, then I’d also have to do all the other doors in the hall, and closet doors in the other bedrooms) and all the trim (again, same problem) is all just so daunting to me…. but now I can’t enter my room without it staring me in the face.  😦  I called one of those friends the other day, and what was she doing??  Painting all her doors white.  “It’s not that hard, Leanne!”  Hmmph.  I guess I’ll have to get started on it one of these days!

xo, Leanne
Every Child Is An Artist

Standard
Every Child Is An Artist

Monday!  Do you love Mondays, or do they make you groan?  I love the back to school part, but not the waking up early, making lunch, rush off to school part.  Often Monday mornings when I’m driving them to school, I look in my review mirror, and see Jordan hasn’t done his hair, and they both have Nutella on their faces from breakfast.  Woops!  🙂

We had an awesome weekend, especially Saturday.  We went down into the States to visit the Costco in Bellingham, then went to the town of Lynden.  I love that place.  It is a quaint town, very Dutch (my heritage is Dutch) and full of antique shops and consignment stores.  I love, love, love the fact that my hubby and my kids love antiquing and thrifting as much as I do!  So fun digging through treasures with the kids…. and showing them what kind of phone mommy and daddy used to use when we were kids.  Gulp.  Those are in antique shops already?!?

Anyways, today I want to show off show you a favorite project of mine.

"Every Child Is An Artist"


My kids create masterpieces, and the only place I have been showing them off so far is on the fridge… our fridge is getting a little crowded!  One day while window shopping in Fort Langley, I spied something like this, and have been waiting for the right spot that was worthy of making it for.  So when Abby took up residence in the corner of our living room, the time had come to make it.

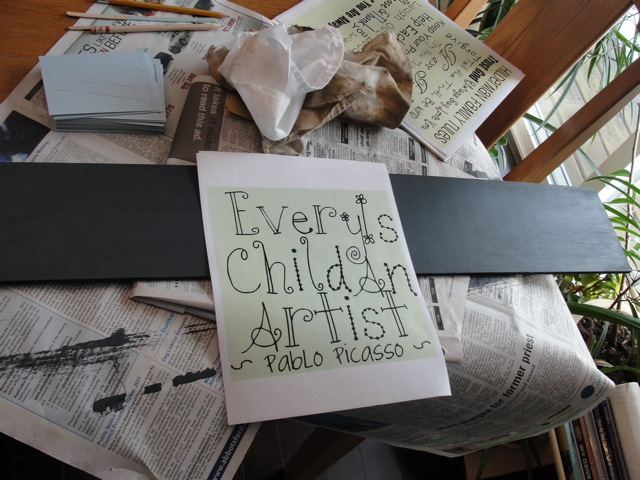
From the free scrapwood we collected from Rona, I picked the size needed, and painted it this cool graphite black… I’m sorry, I don’t remember the name of this paint.  I purchased it off a paint chip at Rona on a whim for my desk re-do, and didn’t keep the chip. I did 2 coats of paint.

Then I found this website called www.Picnik.com.  I am in love with this site, and am in mourning, as they are closing it down in April.  😦  No idea why, but it is very, very sad.  On picnik, I chose my font, and came up with this,

If you follow my facebook page, you would have seen this already… betcha didn’t know where I was going with it though, right?  🙂  (to view a tutorial on how to do this, visit this blog here.)

I then colored the back with yellow crayon for a transfer method...

(to see a better tutorial on my transfer method, please see my post here.)

...cut out each word, placed it on the board and taped into place...

..traced the words, with crayon transfering the letters onto the board, and painted in the words...

For painting the words on, I used a product from Michaels, called Sharpie Poster Paint.  It looks like a Sharpie felt, and works amazing.  I’ve used the same one for a bunch of different projects now, and haven’t run out…. and soooo much faster than using a paintbrush!  Awesome.  (and no, I wasn’t paid to say this, I just love it SO much!)

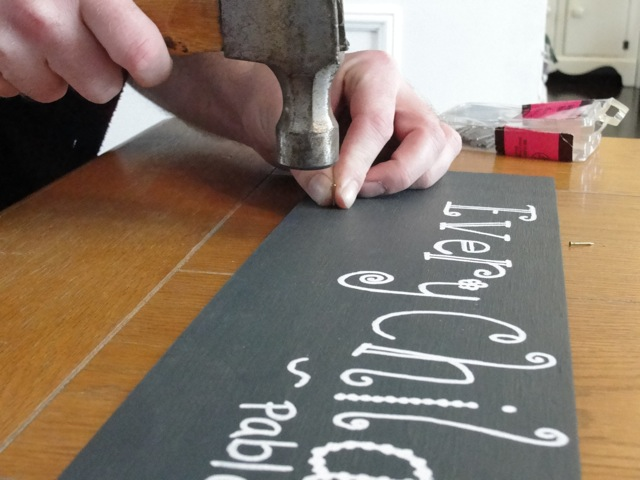
... I then measured the centre, and 4 inches in from each side, for placing of the nails (I wanted 3 nails)...

...hubby used a drill to make little holes for the nails (wanted to make sure the nails didn't go through the board!)...

...added the nails.... I ended up taking the nails out and adding hot glue to them before replacing them for staying power, in case the kids yank at them...

... hung it up, added 3 alligator clips and artwork, and ta-da!! Love!

The third piece of artwork isn’t hung in some of these posts, the kids were getting real antsy at this point, and I just needed to take some pictures and get it done!  Ahh, real life.

...so what do you think???...

Do you love it as much as I do??

Do you love it?  Check out my For Sale Page  for more info!

thanks for reading!!

~ Leanne

If you are just visiting my blog, thanks for visiting! I love comments, and I love, love new followers… to follow and receive my postings by email, just find the spot at the top right hand corner where it invites you to add your email.

I’d also love for my readers to click on “Like” (below) if you liked today’s post, and of course give me your comments, anytime! Just click below where it says “Leave a Comment”. Thanks!!

You Are My Sunshine…

Standard

I had been playing with the idea of making my baby a “you are my sunshine” sign for her room, but I knew the other kids would get jealous about it…  You have to think about those things!!  But here is how I solved it, new to our Master bedroom,

When I saw this on Pinterest,

my problem was solved.

I was almost done my photo canvases, which I posted about yesterday, so I quickly whipped up the sign.
I bought my canvas at Dollarrama (yes, we have one now in our town, and it’s AMAZING!), for $1.25, and again, I had the rest of the supplies on hand.

I gave the canvas an uneven coat of white paint (I wanted the canvas to look a little vintage too, to match the photos)

wrote out the words with stencils (Walmart sells stencils for super-cheap, plus others were from the dollar store).

I painted in the letters with graphite paint, and gave the O in “love” a turquoise heart.  Then, with all 4 canvases, I took some turquoise paint, added the same amount of water to it, brushed it onto the edges, and wiped it off with a damp towel.  This was just to give a little extra dimension to them.  And I love them!

hmmm… I did make the bed, looks more wrinkled on photos than it did in real life!!

What do you think?  My hubby thinks having pictures of the kids over the bed takes away from the “romance”.  I told him to close his eyes.

Thanks for reading!

If you are just visiting my blog, thanks for visiting!  I love comments, and I love, love new subscribersto subscribe, and receive my postings by email, just find the spot at the top right hand corner where it invites you to add your email.

I’d also love for my readers to click on “Like” (below) if you liked today’s post, and of course give me your comments, anytime!  Just click below where it says “Leave a Comment”.  Thanks!!

I’m partying here!

Meet A Table Named Abby

Standard

That’s right, I am naming my furniture!  Abby, (short for Abigail) is named Abby because she is strong, beautiful and stubborn, which reminds me of the Abigail in the Bible.

Abby is Gorgeous!

I picked up Abby off of Craigslist for an awesome deal.  When I first picked her up, my plan was to use her as a craft table for my kids.

Abby "Before"

This is Abby’s before picture.  The more I looked at Abby and tried to decide what to do with her, the more I noticed her beauty.  She is an antique table, and I saw similar tables, unfinished, at antique stores for $300.oo  I decided I wanted Abby to be beautiful… and not a craft table anymore.

Well, Abby didn’t make things easy for me.

I first sanded her like crazy.  She had a varnish on her that needed to be roughed up, and her top was in pretty rough shape.

After priming her legs, I painted them with a creamy white that I had used on Anna’s furniture in the past.

Then came my first experience with staining.

 It was not a good experience.

The first coat took okay, but not as solid as I had hoped for.  The second coat completely bubbled, and was sticky and tacky.

So I had my first experience with stripping.  That’s not fun either.

I stripped and sanded again, and gave it another try.  Again, the first coat of stain was okay.  The second… began to bubble.  This probably sounds silly, but after being an esthetician for 8 years, I knew what was going on.  When nail polish does this, it means the first coat did not dry enough for the second to be applied, plus it was raining and cold out… I didn’t want to admit it, but I would have to wait…  I sanded down the second coat and waited for a sunny day.  It took weeks.  In the meantime I distressed and glazed her legs.  …Finally I could drag it outside and try again.  All the other times I had applied he stain with a paint brush, this time I used a rag.  I enjoyed this much more…  Here is how it turned out…

Abby "After"

Isn’t she gorgeous?!  She turned out very different than I had imagined, but I love her rustic outcome.  And because I love her so much, I am selling her.  She deserves so much better than the abuse she would receive from my kids.  The link on Craigslist will be at the bottom… but for now, enjoy her model shots!

If you are local, and interested in her, let me know!  🙂

(Update, January 2012… no longer for sale.  My family fell in love with it, we decided to keep it!  To see what Abby’s doing now, visit here and here!)

Thanks for reading!

If you are just visiting my blog, thanks for visiting!  I love comments, and I love, love new subscribersto subscribe, and receive my postings by email, just find the spot at the top right hand corner where it invites you to add your email.

I’d also love for my readers to click on “Like” (below) if you liked today’s post, and of course give me your comments, anytime!  Just click below where it says “Leave a Comment”.  Thanks!!

I’m partying here!

A teachers Christmas Gift

Standard

I Love boards with inspiring words on them.  And since it’s slightly inconvenient to have large pieces of furniture projects scattered all throughout the house, I thought maybe I should try making some of these boards… I can still get my painting and distressing obsession done, just on a smaller scale!

So for trial number 1, I decided to make one for a special teacher in our life.  Now that we have 3 teachers and 1 piano teacher to add to the Christmas gift list, I figured it wouldn’t hurt to save some $$ by making the gifts for them!  So for $0, and supplies already around the house, I made this:

How I made it:

left over piece of pine, and a quote printed off from the computer, I first painted the pine in brown...


topped it with turquoise... (which by the way is the new color of our Master Bedroom, I'll be sharing with you soon!)


a little sanding to distress and show some brown from underneath..


decided on placement or the quote...


elementary art came in handy here... I colored the back of the quote with pencil, then traced the top of the quote, to transfer onto the board...


fun!...


hand painted the quote in brown...

I then sanded the top a bit to distress the letters, and I glazed the top and edges with my usual brown paint diluted with water.  I gave it 2 coats of varnish to protect it, and added a gold butterfly (from the dollar store) with a glue gun… and ta-da!


What do you think?  Did I pass the test, or would you have done it different?

Thanks for reading!

If you are just visiting my blog, thanks for visiting!  I love comments, and I love, love new followersto become a follower, and receive my postings by email, just find the spot at the top right hand corner where it invites you to add your email.

I’d also love for my readers to click on “Like” (below) if you liked today’s post, and of course give me your comments, anytime!  Just click below where it says “Leave a Comment”.  Thanks!!

I’m partying here!


Oh, Christmas Tree

Standard

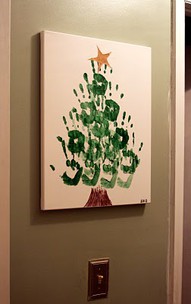
On Friday I mentioned I’d be doing a craft with the kids… my desire was to have this, which I found on Pinterest:

Cute, right?  So, I wanted to this with my 3 kids, to also have a memory of their hands…  so we have Jordan who’s 7, Anna who’s 3, And Elissa who is now 2 days away from being 6 months (!).  Here’s how ours turned out:

Doesn’t really look like a Christmas tree, does it?!  It turned out my canvas was a little too small, and Elissa’s still too young to open her hands for a project like this.  Oh well, maybe next year!

Have you tried to copy anything from Pinterest lately?

Thanks for reading!

If you are just visiting my blog, thanks for visiting!  I love comments, and I love, love new followersto become a follower, and receive my postings by email, just find the spot at the top right hand corner where it invites you to add your email.

I’d also love for my readers to click on “Like” (below) if you liked today’s post, and of course give me your comments, anytime!  Just click below where it says “Leave a Comment”.  Thanks!!

I’m partying here

Love Letters

Standard

I remembered that I forgot to blog about 3 little letters I made for the kids some time ago.  Actually, I made them at the same time I made the Shh…Baby Sleeping sign.

See the E?  When planning my sign, I knew I would want an embellishment on it, so my 3 year old helper and I hit up the dollar store.  When she realized what I was doing, she of course needed her own letter.  Later at home, big guy Jordan was jealous, so I hit up the store the next day to buy him one too.

The A and E already had their first coat of brown by now.  When I went back to the dollar store for the J, they only had one J left… with a huge blob of gold paint on it.  So whoohoo, I managed to get it at 50% Off, 62cents man!  😉

I painted the A for Anna in purple, and the E for Elissa in blue.  When the paint was still sticky, I decided they needed to have some sparkle… but the only sparkle I had was gold eyeshadow!  It worked!

I accidentally got some sparkle on Jordan’s J, but he was okay with it! 🙂

After some distressing, this is how they turned out…

Jordan was thrilled when I showed him his was done with chalkboard paint!

Thanks for reading!

If you are just visiting my blog, thanks for visiting!  I love comments, and I love, love new followersto become a follower, and receive my postings by email, just find the spot at the top right hand corner where it invites you to add your email.

I’d also love for my readers to click on “Like” (below) if you liked today’s post, and of course give me your comments, anytime!  Just click below where it says “Leave a Comment”.  Thanks!!

I’m partying here:

mommy by day, crafter by night, polly want a crafter, not just a housewife


A Truly Beautiful Tuesday

Standard

What a beautiful day I had today!  Not only was the weather GORGEOUS, but my beautiful parents took my beautiful (but cranky) 3-year-old to their place for the whole day.  My beautiful son was of course in school, and my beautiful baby was beautifully charming as always (even though her first tooth has just poked through 😦  ).

So I took advantage off all this beauty (okay, I’ll drop all the ‘beautiful’ now – you get the picture, I’m sure!) and hit the town.  First I ran some errands, and then it was eye candy time.  I headed out to Langley and visited a store I’ve been wanting to visit for some time, called The Passionate Home.  Not only do they have everything I love, but they are also the local suppliers for a very famous paint in blog-land, called Annie Sloan’s Chalk Paint.  This stuff is supposed to be the bomb, as you can use it without sanding or priming your furniture, plus is super easy for distressing.  But at $49.99 per small can quart, I might have to put this stuff on my Christmas list, cuz hubby, although he supports and puts up with a lot, would not be supportive of that purchase!!

Next I slipped over to Fort Langley and spent an awesome time at the Village Antiques Mall.  This is a huge and fabulous place where you could spend forever digging through fantastic and old “stuff” ( a whole lot of tea cups, I noticed!).

After picking up Jordan from school, and walking him to piano class, and a home-made freezer meal was cooking in the oven, I managed to catch up on some current projects:

…only a couple more coats of finishing varnish to go on this very beautiful (oops, sorry) drop leaf table

and starting touches on a gift for a very special teacher

How was your Tuesday?  And have you heard… local snow flurries forecasted for Thursday!  😦  Not ready for snow yet!

Thanks for reading!

If you are just visiting my blog, thanks for visiting!  I love comments, and I love, love new followersto become a follower, and receive my postings by email, just find the spot at the top right hand corner where it invites you to add your email.

I’d also love for my readers to click on “Like” (below) if you liked today’s post, and of course give me your comments, anytime!  Just click below where it says “Leave a Comment”.  Thanks!!  (If you are a follower, and received this post by email, you will need to visit the blog page, by clicking today’s title in the email to add your “like’s” and comments.)

(Partying at Show Me What Ya Got @ I’m Not Just A Housewife, Ta-Da Tuesday @ Mommy by day, Crafter by Night, Craft Link @ Polly want A Crafter, DIY Project @ aka design)