Category Archives: Gifts

No-Sew Fleece Blanket

Standard

URL change tomorrow…

Please remember that tomorrow will be my URL change!  Whoohoo, I am very excited, it’s been a lot of work to create my self-hosted blog site, but I love the way this has turned out.

Why the change?  Hosting my blog at wordpress.com has been fantastic, but there’s a few restrictions that weren’t really working for me.  One example is that I am in no way allowed to make $$ from my blog at wordpress.com.  Being a woman who can’t stand not making a little money for the family, I wasn’t really cool with this.  Another example is when I host a linky party, like I did the past couple Sundays, wordpress.com doesn’t accept Javascript, which allows all those who link up to show on my blog page, it has to be re-directed to an outside page…. just those sorts of things.

How is wordpress.org different for me?  Here I have to self-host my blog site, and maintain everything about it.  A lot if geek-talk, but I do find it interesting and fun.  And I will be able to do the above without any problems.

What to expect with the change?  I will have a new theme, which I think is very cute, and would love for you to check it out tomorrow!  There are still a few glitches, like a few broken links, missed pictures and so on, but nothing that really affects the blog, and it’s all being worked on!

Why I’m a little stressed and want to make sure you are on top of the change?  Because as far as all my research has shown, I cannot automatically transfer you as a follower over to the new blog.  I need you to sign up again!  After the growth I’ve had since I began this blog 6 months ago, it makes me sad that I may lose some of you, even if it’s simply because some of you may not read my blog every day, so not realize this is all happening!

How will this all happen? 

*For those who follow me by email:  tomorrow I can enter your email address as a new follower, but I still need you to confirm it.  At some point after my post tomorrow , expect an email asking for your confirmation for subscription to my blog.  Just click on the link, and it will be done.

*For those who follow me by RSS Feed, you will need to subscribe again.

*For those who follow me through WordPress, I have no way to switch you over, and you will need to subscribe again.

*For those who follow me through Linky Followers, I am able to switch it over automatically, so the assumption is you have nothing to worry about.

*For those who follow me though Facebook, this too should happen automatically.

SO, watch for my post tomorrow, because I will be announcing my GIVEAWAY!!  All the “rules” will be posted tomorrow!!  Yay!  🙂

Birthday Day!!

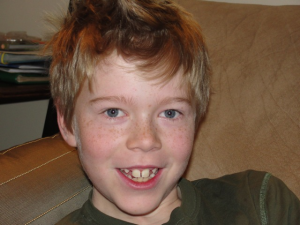
That’s right, today, this gorgeous little man turned 8!!!

Where Does The TIme Go???

We celebrated with him this morning by spoiling him with a new hockey net and hockey stick!  He was so excited, he was outside by 8 am to play hockey on the driveway!

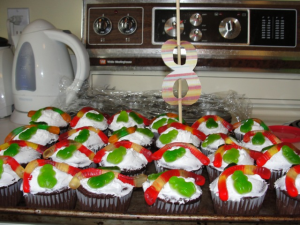
I even managed to bake his class cupcakes!  As you know, I’m really no good at baking, so I made sure to embellish them a bit, just in case!!

8th birthday cupcakes... with worms and frogs!!

A bunch of years back, I had watched an episode of Rachel Ray (whom I really can’t stand, but I was glad I caught this episode!)  and her guest showed how to make a “no-sew” blanket.  This stuck with me for a while, but eventually I forgot about it, until I read this post here.

Then this morning, while at the fabric store with my mom, I found this kit!

no-sew fleece blanket kit

At $16.50 for 2 patterns of fleece material, the price couldn’t be beat, so I bought it and whipped it up this afternoon…

first, lay the 2 fabrics on a flat surface, with "wrong" sides facing each other... then cut a 5 x 5 inch square from each corner... I used cardboard as a template...

I then marked the template for the cuts of fabric... each edge needed to be cut into 5" inch strips, each an inch wide...

...then tie each pair of strips into a double knot....

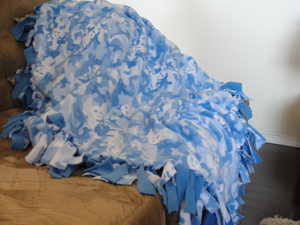
and ta-da!! the blanket is approximately 4ft x 3ft... perfect cuddle size!

it took me one episode of Toopee and Binou, and an episode of the Wiggles... so about an hour from start to finish!! Not too bad for a very cute blanket and lots of cuddles to follow!

What do you think?? Are you inspired to try to make one??

Thanks for reading!  (and please read my post tomorrow so you can keep following me!!)

xo, Leanne
Owl Always Love You!

Standard
Owl Always Love You!

Okay, so when I found this on Pinterest,

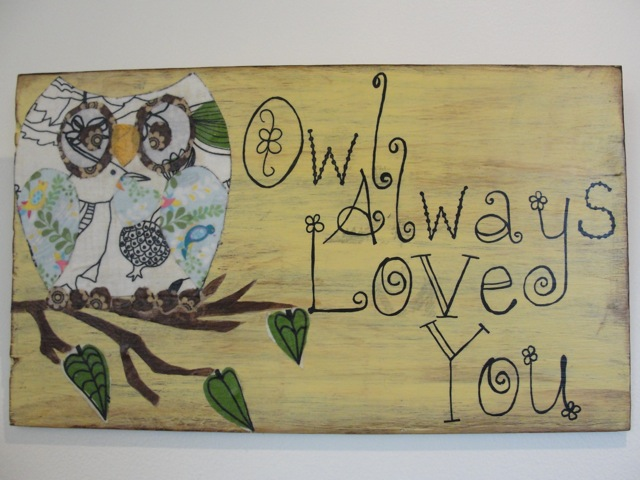
I knew exactly what I would be making for my Baby girl’s Valentines Gift. You’ve already seen what I made for my other 2 kids here, but since Elissa is too small for us to know her personality, she needed something a little extra special… so I made this,

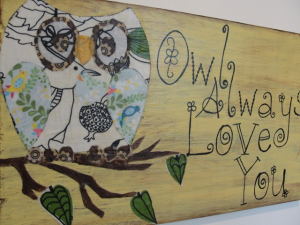
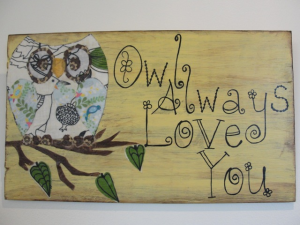
baby valentine gift

"Owl Always Love You"


Isn’t it freakin’ cute?!  I think so!!  Here’s how I made it:

found a board in my stash, gave it a coat of brown, and a coat of yellow (Martha Stewarts Cornbread)...


...made my words on picnik.com, printed it out....


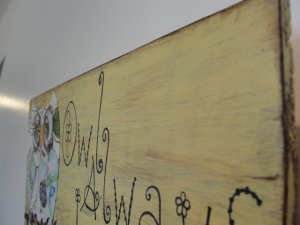
.. did some light sanding, and used "Distress Ink" over the whole board to give it a distressed look, cuz I was feeling kinda lazy and didn't feel like doing so much sanding!...

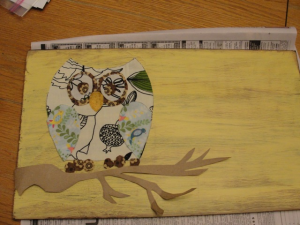
And this is when I couldn’t find the camera, and I feel so bad!  I hope you can understand what I did next.  I first googled different owls, and as owls are huge right now in decor, a few different choices were easy to find.

I picked one I thought would be easiest to copy.  I drew the owl out on brown craft paper, free hand.

I then cut out each part of the owl, example, the wings, the body, the eyes etc, and used those as templates for the fabric.

I still have tons of fabric left over from when I decorated my baby girl’s room, I traced the brown paper templates onto the fabrics, and cut them out.


owl theme

...placed everything on the board to see where it fit best...

...cut out the words, and placed them on to fit...

I had already coloured the back of the words in pencil, and when the words were placed on, I traced them with a pen, tranferring the words onto the board.  I painted them in black.  (To see my transfer method in a different example, see here)


...and piece by piece, I modge podged each layer of the picture on...


... I finished off the board with 3 top layers of Modge Podge, and ta-da!


baby valentine gift

"Owl Always Love You"


Let me know what you think!  I’d love to hear from you!

xo, Leanne
I’m partying here!

Valentine’s Gifts for the Kids

Standard
Valentine’s Gifts for the Kids

While I’ve been working on signs for other people, Jordan has started asking that I make him something.  Well of course!!  And with Valentine’s coming up, what a great reason!

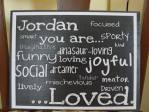
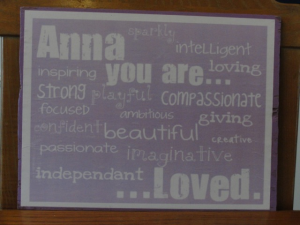
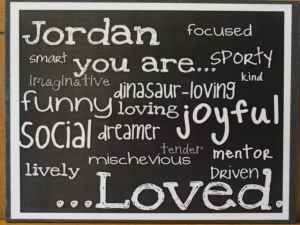
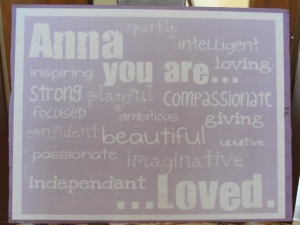
This is what I made, one for Jordan, and one for Anna,

You are Loved Sign Kids Valentines Gift


Cute, right?  And Easy-Peasy too!

Because, let’s face it, kids don’t always completely appreciate the hard work that goes into a gift, I didn’t want to sweat over this one.  So, I first created my artwork on picnik.com, following this tutorial here.  I really don’t know what I’m going to do when that site closes down in April, I guess I should start searching for options!!

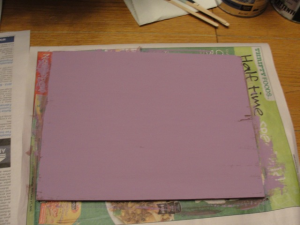
painting wood


I had hubby cut me up some wood to size, with enough for a small border all the way around my printout, and painted the wood to match.  (For projects like these, by the way, I just use craft paint from the dollar store!)

Then, the most difficult part, I just decoupaged them on!

decoupage


A thin layer of ModgePodge with a sponge brush, then carefully lay on the print, smoothing out any bubbles (Anna’s was the first one I did, so it does have a few bubbles 😦  ) Jordan’s is perfect!)  Finish with a top layer of Modge Podge, and ta-da!  I added wire hangers to the back … and yes, hubby has taught me how to do this, so I don’t have to bug him everytime I need a hanging wire put on – I now use a drill!  Yay me! … and gifts are DONE.  They will be getting some awesome chocolate with it of course, because you know that’s what they really want anyways!

And of course I made something for baby, but I’ll show you that on another post, it’s extra special!

What are you doing for Valentine’s?!

Thanks for reading!!  xo, Leanne

Santa’s Elves Worked Hard On This One!

Standard

If you follow my Facebook page, you may have noticed how big and fun my blogging day was yesterday…

First, I was featured with as a guest blogger on Randee’s Organized Chaos!  This was my first time, and was very cool.  I hope you check it out, I have a few new projects on there that I haven’t blogged about yet, and would love for you to see!  I will be blogging on the how-to’s soon (today I want to show you something different).

Then later in the day, I found my Dream Big project was featured as a favorite on AKA Design!!  This is HUGE for me!!  I am SO thrilled.  Check out their blog, they are so talented, and Canadian!

I also found a blog hop on Momma’s Like Me.  If you’re a blogger, and would like to participate, it happens on Wednesdays, and is a very cool idea.  Even if you aren’t a blogger, it’s a neat thing to check out and visit, and maybe follow, all sorts of blogs.  I’ve mentioned Lacee from Momma’s Like Me before, on my post about Smoothies!

Also by the time I went to bed last night, I surpassed 50 followers!!  Whoohoo!  I know this isn’t a big number to some, but for me, it makes me very happy!  So welcome to everyone, and I really hope you love what you read.  Thank you so much for the support!

Lastly, you may or may not have read, that my 7-year-old son has fallen in love.  With Abby.  Yes, he loves my table named Abby.  Therefore, Abby is no longer for sale.  She has made her way into our lives!

Okay, so now that I’ve finished gushing, I want to get on to today’s topic.  Before Christmas, I put out a plea on all social media for help.  My 3-year-old daughter asked Santa for a pink helicopter.  Anytime anyone asked her what she wanted for Christmas, she said in her very determined voice, “pink helicopter”.  When we went to see Santa and he asked what she wanted, she said “pink helicopter”.  Obviously, we didn’t want her Santa-spirit broken, so we needed to find a pink helicopter.  Do you know there’s no pink helicopters anywhere???  In fact, it was hard to find any helicopters at all!  We finally found a Lego helicopter, but really, I wasn’t about to paint every piece of Lego pink!

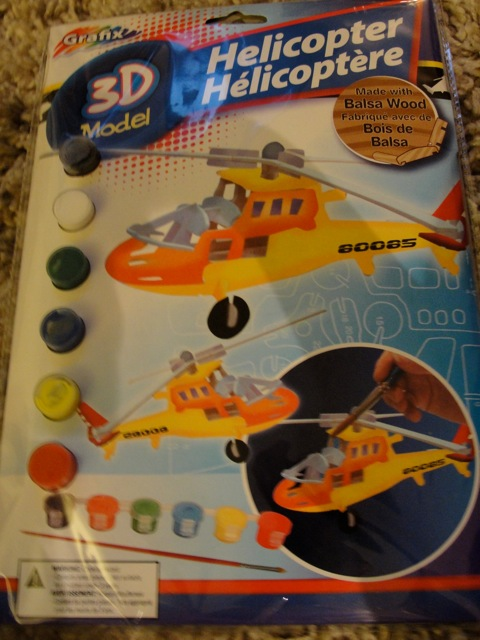
Finally, a friend found something for us, about a week before Christmas.  She found a helicopter model, made of Balsa Wood.  Good enough!!

So very lucky for me, my parents took our 2 older kids for a night, and I had the chance to get this helicopter together… it took a really long time!  First I built it, to figure it out, and took it apart again to paint it.  First though, I found some adorable scrapbooking paper from my huge collection,

…traced out the tail of the helicopter, and decoupaged it on.

The rest I painted with pink craft paint from the dollar store, and some parts were also painted with Martha Stewart pink glitter paint.  The glitter paint is adorable, but for some reason gives off a bit of a yellow hue.  Oh well, still cute!

After all the paint and ModgePodge had dried, I rebuilt it again, with some of hubby’s strong glue to hold the pieces together.

When I asked her Christmas night how she liked her gift from Santa, she said, “I like it…but…maybe I would like a blue helicopter instead….maybe made out of Lego.”

Seriously child??  “Oh, honey, if only you knew how hard Santa’s elves worked on this helicopter!”

Thanks for reading!

~ Leanne
If you are just visiting my blog, thanks for visiting!  I love comments, and I love, love new followersto follow and receive my postings by email, just find the spot at the top right hand corner where it invites you to add your email.

I’d also love for my readers to click on “Like” (below) if you liked today’s post, and of course give me your comments, anytime!  Just click below where it says “Leave a Comment”.  Thanks!!


Dream Big

Standard

First I have a couple of “business” things to mention 🙂  First, I participated in a cool idea put on by Heather from Inspire Me Heather.  She created “What I Like About Your Blog” which allowed us to sign up, and get critiqued by other bloggers.  I received some awesome feed back, so you will start to see a few minor changes to my blog… including a new Facebook Page!  I’d love for you to Like my new page, and you can find the “Like” on my side bar (right on top of the follow me on Pinterest button *hint hint*).  Plus another feed back is that I don’t even have my name on my blog!  Not so personal!  It’s those little things you don’t even think of, that other people notice, so if you ever have some feedback you think would help make my blog better, I’d love to hear it!   …come to think of it, I think I forgot to mention my name on my Facebook Page!!  ~I’ll get to it soon!  My daughter is bugging me for the computer… she wants to play her sesame street games!!  (she’s 3!)

But first I want to write this post, I’m very excited about it, it was a bit of a challenge for me, just because things kept going not-quite-right, but I LOVE the way it turned out.

For Christmas I had pulled another niece’s name for Christmas, so along with a bunch of other things she asked for, I made her this:

I began with a piece of pine, did a coat of brown paint, and then an uneven coat of white paint...

I played with the fonts on the computer, and printed it off...

I colored the back of the quote with pencil, then traced onto the board...

I had read on a few blogs that they used black Sharpie felt to color in the words… so for convenience I gave this a try.  It worked fine, but when I sanded, all the letters smeared!  Although this look would be cute on the right piece, this was not the right piece for that look!…

...so I painted it over with a thin coat of white...

...this time I painted the letters with a graphite colored paint...

...I then sanded the whole thing, distressed the edges, and added brown paint to the corners...

...and promptly wiped it off to enhance the distressing...

..made my glaze - 1/2 brown paint, 1/2 water... and glazed the whole board (wipe on, wipe off)...

and ta-da!

Thanks for reading!

If you are just visiting my blog, thanks for visiting!  I love comments, and I love, love new followersto follow and receive my postings by email, just find the spot at the top right hand corner where it invites you to add your email.

I’d also love for my readers to click on “Like” (below) if you liked today’s post, and of course give me your comments, anytime!  Just click below where it says “Leave a Comment”.  Thanks!!

I’m partying here!

A Prayer for a Niece

Standard

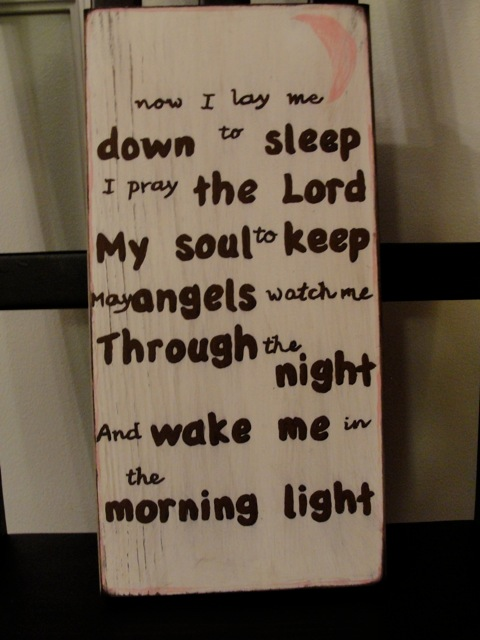
My version….

of my inspiration…

(source)

This is a prayer myself and all my siblings said every night before we went to bed, and we have now all passed it on to our own children (15 all together!)  So when I saw my inspiration on Pinterest, and had pulled my little 2-year-old niece’s name for Christmas, I really wanted to make this for her.

In our scraps of wood, we didn’t have the right size, so  I went with something different.  But while working on the project, the outcome just kept getting worse and worse… and this is what I ended up with this…

Totally not what I was going for.   So I changed that, into this, for our entertainment centre.

Hubby and told me Rona sells scrap pieces of wood for super cheap, so we packed up the kids and headed over there.  We searched and searched for scrap, and couldn’t find any.  I was so disappointed, as the regular cost of wood is a little too pricey to do this as a hobby…. finally though, we settled on a piece of wood, waited for the guy who was to help us to get off his dinner break, and he cut the wood for us… suddenly, out of the corner of my eye, I saw it, scrap wood!  I asked how much, he said Free!  Whoohoo!  He even cut it up for us for free!  We walked out of there with arm loads of wood, I was pumped!!

When we got home, I sat in front of the computer, and copied my inspiration line for line.  This feels like plagiarism to me… but everyone’s doing it…

So with the perfect shaped wood, some pink and white paint, some sanding, a little distressing and some glaze, I had a sweet little Christmas gift for a sweet little niece!

Thanks for reading!

If you enjoyed this post, I’d love for you to become a follower… and thanks for the support!

I’m partying here.

A Gift for a Baby Girl

Standard

I didn’t even know where to start with showing you all the gifts I made for friends and family this Christmas (let me just say, signs with quotes was “my thing” this year…and I’m not finished!), so I figured I’d just start with my first project, and go from there!

One of my very good friends is expecting her third baby in March, and for the first time she found out the sex… and it’s a baby girl!  (which immaturely we are very excited about, because then her, I and our other best friend will all have 1 boy and 2 girls!  oh, so highschool… we know.)  So even though we agreed not to give each other’s kids Christmas gifts this year – and just had a great Christmas party with all 3 families instead – I couldn’t keep myself from making a little something for this little baby… only it turned out not-so-little.

Cuuute!  I know there are a few crooked words, and a few squished words, but I’m giving myself a break and loving it anyways!  And my friend and her hubby love it, so that’s what matters!

Here’s how it all came together:

I found this on Pinterest...

(source)

and I found a big piece of pine in our "collection"... painted the border and sides brown...

...barely waited for the paint to dry, and added white...

...left the edges brown... when the paint dried I sanded it, and distressed the edges...

...using stencils, I eyed the placing, and stenciled the words on and free-handed the dragonfly...

...painted in the words with brown and pink...

...glazed it with brown paint diluted with water...

...sanded again to distress the words...

...and done!

I’d love to know what you think!!

Thanks for reading!

If you enjoyed this post, I’d love for you to consider becoming a follower… and thanks for the support!

I’m partying here.